0.0: Swift OpenGL Setup
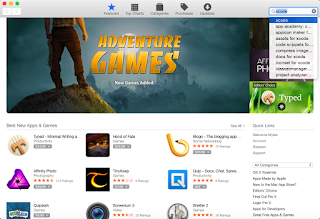
To follow along with these tutorials, you'll need a Mac with the latest public version of Xcode (Xcode 6.4 as of this writing). To get Xcode, open the App Store and search for Xcode.
You'll see a bunch of applications, but Xcode should be the first one if you typed in "xcode" into the search field. I already have the application downloaded, so the button says "Open", but if you haven't downloaded Xcode, the button will say "Get".
You may be prompted to input your AppleID and password and click "Buy". Remember, the app is free. The app will download automatically when you "Buy" the app. Once it has downloaded, you'll find it in your Applications folder, Launchpad, or by holding down ⌘ and pressing the spacebar you'll get Spotlight Search where you can type in "xcode" and press return on the keyboard.
The first time you open Xcode, you should see the splash screen. This is a great starting point to create new projects or open existing and recent projects. Create a new project by clicking on "Create New Project" (I've blurred out my previous projects, but you would see your previous project at the right of the welcome screen). While in Xcode, you may open the Welcome Screen at any time by pressing ⇧⌘1 on the keyboard.
The page down menu prompts you to select the type of project to create. On the left side of the menu, select Application under OS X. Then select Cocoa Application from from the icons at the left. Click next. You'll be prompted for a name, company, etc. The name of our project is SwiftOpenGL. Leave the Organization name field blank for now. For Organization Identifier, you have to put something, so it nothing is there, insert "com". Click on the language dropdown menu and select Swift if it is not selected already. Finally, make sure Use Storyboards is checked and Create Document-Based Application and Use Core Data are not checked.
Click next and you'll be asked for a location to save the project and related files. I recommend using the Developer folder that should have been created when you downloaded Xcode. You should be able to find it by click on the dropdown menu at the top of the menu and click on Macintosh HD.
Select the Developer folder, and click Create. A whirlwind of computer magic will ensue and you'll be presented with your first Xcode app! At the top left of the screen, you'll see a play button icon. This is the Run button. Click Run and you're application will build and launch. It's not exciting--just a grey window--but it'll let you know that you have a working application.
Now that we have a working app, we need to add a view to our window that will display out OpenGL content. Continue to 0.1: The SwiftOpenGLView


Comments
Post a Comment